REVIEW · EDINBURGH
Stirling Castle, Whisky & Kelpies Tour starting Edinburgh
Book on Viator →Operated by Experience Scotland's Wild · Bookable on Viator
A day trip with castles, lake views, and whisky. This one connects Stirling Castle with Loch Lomond and finishes at The Kelpies—a stacked route that still feels human-paced thanks to a small group and frequent stops. I like that you get history, a bit of hiking, and a proper whisky tour in one long outing.
What I really like are two things: first, the guide-led flow from the castle to the lake region, plus short walks that break up the drive. Second, the Glengoyne Distillery stop includes a guided tour and the chance to sample a wee dram (extra ticket cost, but worth planning for). One thing to watch: you are not on a full lunch included plan, and the castle/distillery entries cost extra on arrival.
In This Review
- Key takeaways before you go
- A stacked day from Edinburgh that actually stays manageable
- Price and what you’re really paying for (plus the extra tickets)
- Group size, comfort, and pacing: why 8 seats matters
- Stirling Castle: where Scottish history comes at you fast
- Loch Lomond and The Trossachs: the Highland Boundary Fault in plain words
- Glengoyne Distillery: whisky craft plus a wee dram
- The Kelpies & The Helix: quick stop, big photo effect
- The villages, the ride, and the Edinburgh wrap-up
- What this tour is best for (and who should skip it)
- Should you book Stirling Castle, Whisky & The Kelpies from Edinburgh?
- FAQ
- How long is the Stirling Castle, Whisky & Kelpies tour?
- What’s included in the tour price?
- Are Stirling Castle tickets included?
- Are Glengoyne Distillery tickets included?
- Is food or drink included?
- Where do I meet the tour, and what time does it start?
- What is the maximum group size?
- What ages can join?
- Does the tour run in bad weather?
- FAQ
- Can I cancel and get a full refund?
Key takeaways before you go
- Small group (max 16) in an air-conditioned 8-seater minibus, with time to get out and walk
- Stirling Castle is the core stop, but entry is not included and the time inside can feel tight depending on pace
- Loch Lomond and Balmaha includes a scenic hike segment, so bring real walking shoes and expect uneven ground
- Glengoyne Distillery is guided with Scotch whisky production explained and samples offered
- The Kelpies & The Helix is short (about 20 minutes), but they’re genuinely impressive in person
- You’ll also pass through Drymen and Croftamie, which adds a more local countryside feel to the ride
A stacked day from Edinburgh that actually stays manageable
If your Edinburgh time is limited, this tour is a good way to see Scotland beyond the city without renting a car. The day runs about 9 hours 30 minutes, starting at 8:30 am from 256-260 Morrison St (right near public transport). It’s also designed for people who want to get out of the van and move—there are guided walking moments, not just scenic roadside photo stops.
The big idea here is variety. You’ll do royal-scale history at Stirling, switch to lake and hills around Loch Lomond, then swap tourism facts for whisky craft at Glengoyne, and finally wrap with a myth-themed modern landmark. It’s a lot packed into one day, but the small-group size keeps it from feeling chaotic.
You can also read our reviews of more tours and experiences in Edinburgh.


Price and what you’re really paying for (plus the extra tickets)
The listed price is $90.28 per person, and that covers the parts that are hard to organize on your own: transport, a guide, and guided stops. It also includes short hikes and walking time.
What is not included is the two biggest paid entries:
- Stirling Castle: about £21.50, pay upon arrival
- Glengoyne Distillery: about £22, pay upon arrival
That means your day’s “real” budget is the base tour cost plus roughly £43 in total for castle and whisky. In exchange, you’re getting guided context and a group day that would be more effort to stitch together independently (especially the whisky timing).
No food or drinks are included, so plan lunch like an adult with a schedule: either budget for something when you get chances, or bring a snack for the gaps. I’d also keep water handy, especially if weather turns and the hike portion hits a bit harder than you expect.
Group size, comfort, and pacing: why 8 seats matters
The tour maxes at 16 travelers, and it uses an air-conditioned 8-seater minibus. That might not sound dramatic, but it changes the day. Fewer people means the guide can actually herd the group without turning every stop into a search-and-rescue mission.
Pacing is one of the tour’s strengths when the guide keeps things moving. Multiple guide names show up in the experience pattern—Chris, Cameron, Pete, Perry, Warren, Georgie, Richie, Harris, Magnus, Andrew, and Aila—and the common thread is control of time at each stop. At its best, you arrive early enough to avoid the worst crowds and still have time to see what matters.
One possible drawback: if you’re a slow-burn castle admirer, you might wish there were more time at Stirling. Some people felt the castle window could be longer, so go in with a plan for the highlights you care about most, and don’t try to read every label like it’s a library.
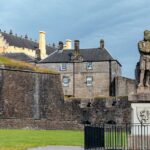
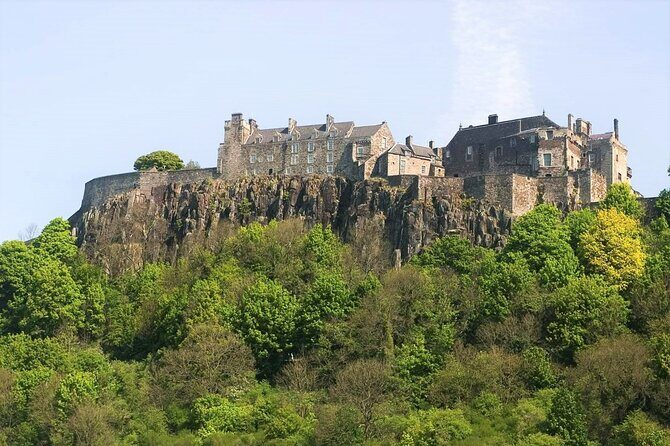
Stirling Castle: where Scottish history comes at you fast
Stirling Castle is your first big stop, with about 1 hour 30 minutes on-site. The guide takes you through why this place mattered, including the web of Scottish and English power plays over centuries. You’ll also hear the Jacobite connection tied to Bonnie Prince Charlie during 1746, plus its links to Mary Queen of Scots and the “back-and-forth” control during the Wars of Independence.
What makes it compelling is how visible the strategic logic is. Even if you only get a guided walkthrough, you get the sense this fortress was built to command the surrounding area. And you’ll get serious views from the castle grounds, which is helpful because it gives your brain a map of the region.
Practical note: castle entry is extra and paid on arrival (about £21.50). If lines are an issue, the day tends to go smoother when you buy promptly. Also, you might hear bagpipes during the Stirling experience—some groups have had that as a pleasant surprise, even though it’s not something you should plan your day around.
If I were optimizing your visit, I’d focus on:
- the main rooms and the story the guide is emphasizing
- photo angles from the grounds (when you can step outside)
- any viewpoints where you can quickly orient yourself
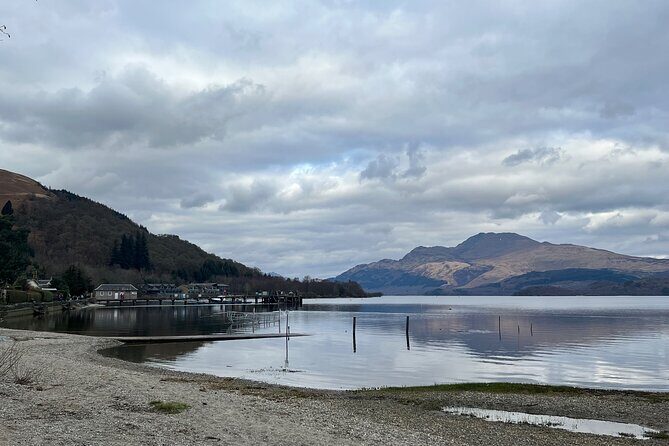
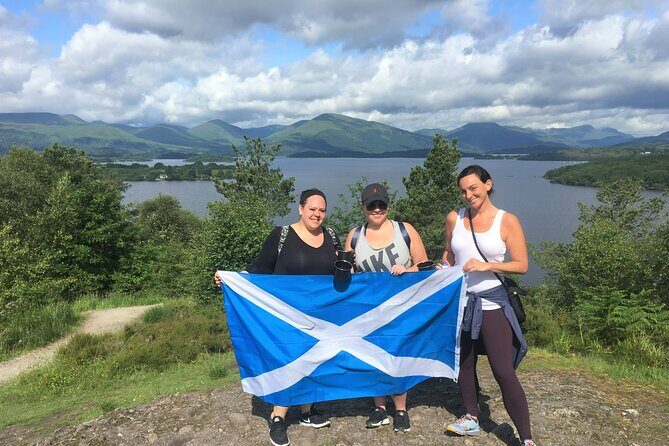
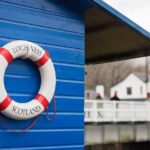
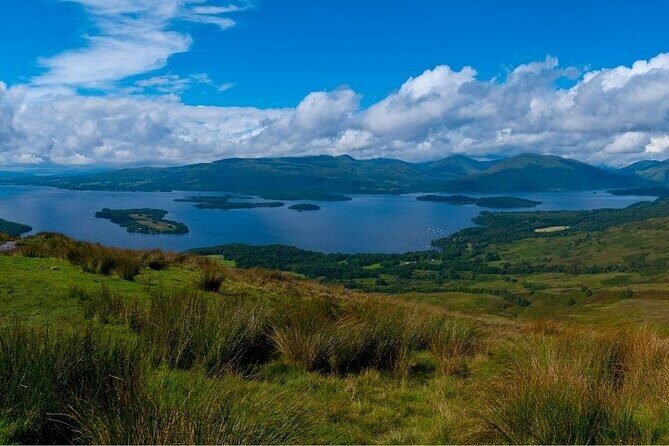
Loch Lomond and The Trossachs: the Highland Boundary Fault in plain words
After Stirling, you get a short stop connected to Loch Lomond and The Trossachs National Park. The schedule shows a brief stop of about 20 minutes, with the guide sharing the story of the Highland boundary fault line—how ancient land events helped shape the dramatic scenery you see today.
Then you’ll spend about 1 hour at Balmaha for a scenic hike portion. That’s where you’ll feel like you’re in the Highlands rather than just passing through. The guide also weaves in stories of history and legend, plus wildlife talk.
Here’s the real-world consideration: the hike is described as short, but not necessarily flat or gentle. One caution from the overall experience pattern is that the climb or footing can feel more demanding than you’d expect if your shoes are more fashion than function. So bring proper walking shoes/boots, dress in layers, and don’t assume it’ll be a stroll.
If you want the best payoff, treat Balmaha as your “slow down” moment of the day. Take in the water views when the group pauses, and don’t try to outrun the schedule unless you’re comfortable missing a story the guide is telling at that moment.


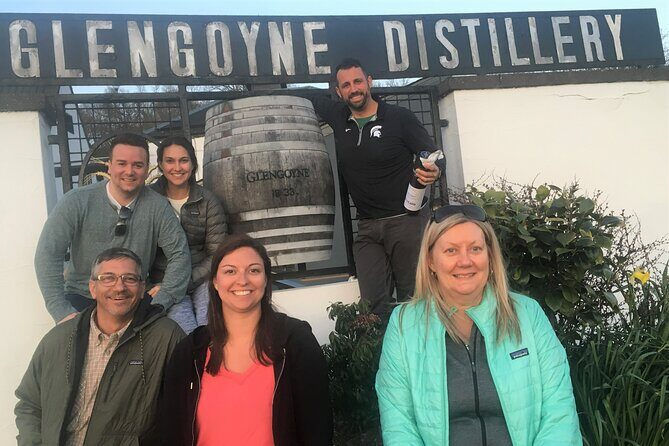
Glengoyne Distillery: whisky craft plus a wee dram
Next up is Glengoyne Distillery, with about 1 hour allocated there. Entry is extra (about £22, pay on arrival). Inside, you’ll get a guided distillery tour where Scotch whisky production is explained, and you’ll have the chance to sample a wee dram.
This is one of the most valuable parts of the day because it’s not just sightseeing. It’s a behind-the-scenes process tour that turns whisky from a bottle on a shelf into something you can picture. If you’re new to Scotch, it’s an accessible way to learn the basics without needing a class.
Also, this stop makes sense in the overall rhythm. You’ve been walking and moving through countryside scenes. The distillery gives you a change of pace while still staying “Scotland-themed.”
Two practical tips:
- Go easy on your dram if you still have the final photo-and-walk stops ahead.
- If you’re sensitive to cold or rain, dress for it anyway. Distilleries can be comfortable, but the start/end of touring still depends on weather and crowd flow.
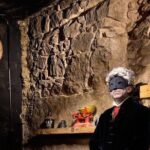
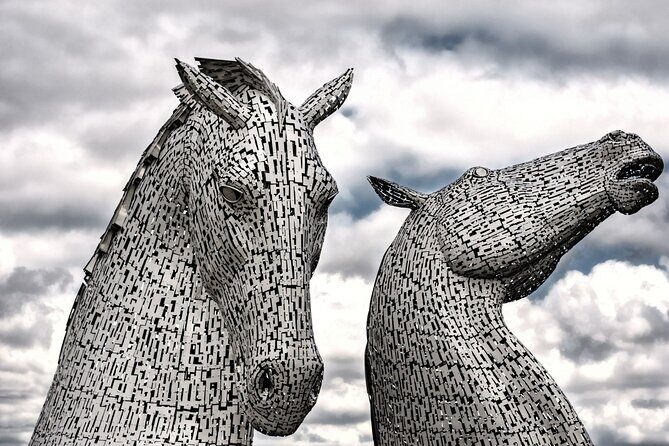
The Kelpies & The Helix: quick stop, big photo effect

Your final main sights stop is The Kelpies & The Helix, around 20 minutes. It’s short by design, and that’s fine because the structures do most of the work for you. In person, they can hit harder than photos, especially if you get an angle where you can see the full scale.
The guide includes the myth background: kelpies as creatures tied to water lore, with stories that blend fear-of-the-loch with older ritual ideas. The Helix setting also frames them well for photography, and the stop is timed so you’re not stuck there while the group gets tired.
One thing to keep expectations realistic: this is more of a look-and-learn moment than an extended guided interpretation of every detail. If you want deep meaning of every statue element, it helps to bring curiosity and ask your guide a question during the stop.
The villages, the ride, and the Edinburgh wrap-up
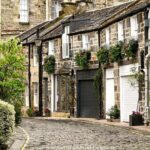
Between the big headline stops, you’ll travel through small towns like Drymen and Croftamie, plus time at Balmaha. Those “in-between” moments matter because they help you feel like you’re moving through real Scotland, not just hopping from landmark to landmark.
There’s also an Edinburgh touchpoint: the tour includes about 15 minutes there as part of the day. It’s not a full city sightseeing block, but it works as a gentle reset before the day ends back at the meeting point.
From an efficiency standpoint, starting and ending at Morrison St keeps the logistics simple. From a convenience standpoint, that means you should plan how you’ll get to the pickup location if you’re based around the Royal Mile or farther away. A short taxi or tram ride can save you stress early in the morning.
What this tour is best for (and who should skip it)
This tour is ideal if you want a single full-day introduction to Lowlands + Highlands flavors: Stirling Castle history, Loch Lomond nature scenery, whisky culture, and the Kelpies. It’s also a good fit for people who like guided storytelling but still want time to walk and take photos.
It may be less ideal if:
- you want long, unhurried museum-level time at Stirling Castle
- you hate hikes or aren’t comfortable with uneven outdoor footing
- you’re trying to build a day without paying any extra tickets
- you expect food to be provided (it isn’t)
The age range is 12 and up, and the tour runs in all weather conditions, so layer up and pack waterproof clothing if rain is in the forecast.
Should you book Stirling Castle, Whisky & The Kelpies from Edinburgh?
I’d book it if you’re the type of traveler who likes variety, wants a guided route, and is happy to pay a couple of entry fees for the big-ticket stops. The best value is the way the day strings together four different Scotland “modes” with minimal hassle: castle first, lake hikes next, whisky craft after, then myth-themed modern sculpture to close.
I’d think twice if you need guaranteed long time at the castle or you prefer a totally flat, low-effort nature stop. In that case, consider adjusting expectations for Balmaha and Stirling time—or pair this with a separate, slower Scotland day focused on one place.
If you do go, my practical advice is simple: wear proper shoes, bring a snack plan, and arrive with your must-see list for Stirling Castle. That way, even with a tight schedule window, you leave feeling like the day hit the points that matter most.
FAQ
How long is the Stirling Castle, Whisky & Kelpies tour?
It runs for about 9 hours 30 minutes (approx.).
What’s included in the tour price?
Transport in an air-conditioned 8-seater minibus, a guide, small group active sightseeing, driving and walking, travel around the Scottish Highlands, and guided short hikes.
Are Stirling Castle tickets included?
No. Stirling Castle entry is not included, and you pay about £21.50 upon arrival.
Are Glengoyne Distillery tickets included?
No. Glengoyne Distillery entry is not included, and you pay about £22 upon arrival.
Is food or drink included?
No. There’s no food or drinks included.
Where do I meet the tour, and what time does it start?
You meet at 256-260 Morrison St, Edinburgh EH3 8DT, UK. The start time is 8:30 am.
What is the maximum group size?
The tour has a maximum of 16 travelers.
What ages can join?
The tour is for ages 12 and up.
Does the tour run in bad weather?
Yes, the tour operates in all weather conditions. Dress appropriately in layers and bring waterproof clothing.
FAQ
Can I cancel and get a full refund?
You can cancel up to 24 hours in advance for a full refund. If you cancel less than 24 hours before the start time, the amount you paid won’t be refunded.