A short walk can unlock a big battle story. This Stirling Bridge history tour is a focused, small-group walk that connects William Wallace and Andrew De Moray to the 1297 clash that changed Scotland’s fight for independence. You’ll meet right by the Old Stirling Bridge area and get the battle explained in plain, human terms.
I love the way the guide turns names like William Wallace and Andrew De Moray into people you can picture, not just textbook labels. I also like the practical way you’re shown where the old wooden bridge was positioned, so the action isn’t stuck in theory.
One thing to consider: the experience runs outdoors and needs good weather, so plan for cool, wet days in Stirling.
In This Review
- Key Highlights at a Glance
- Stirling Bridge: Why This 1297 Battle Still Feels Close
- Meeting at Laurencecroft Road, Steps from the Old Bridge
- What You’ll See at the Main Stop on the Bridge Walk
- The Old Wooden Bridge: Where It Was and Why It Matters
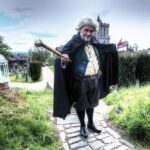
- Wallace and De Moray, Not Just Their Names
- How the Guides Make the 1297 Details Feel Real
- Braveheart Myths vs. the 1297 Story You Can Verify
- Small-Group Size: The Difference Between Listening and Learning
- Expect an Outdoors-First Experience (Even When It’s Not Warm)
- Why People Pair This With Bannockburn on the Same Day
- The Price: How $34.45 Can Still Be Good Value
- Who Should Book This Stirling Bridge Tour
- Things to Consider Before You Go
- Should You Book This Stirling Bridge Tour?
- FAQ
- How long is the Braveheart (Battle of Stirling Bridge) tour?
- Where do I meet for the tour?
- Is this tour small-group?
- Is the tour in English?
- Do I get a mobile ticket?
- Is admission included?
- Does the tour happen outdoors?
- What happens if the weather is bad?
- Can I cancel after booking?
- Is it suitable for most people?
Key Highlights at a Glance
- Small-group cap of 15 keeps questions from getting lost
- Meet-up by the Old Stirling Bridge makes orientation fast
- Wallace and Andrew De Moray get full context, not just the famous ending
- Old wooden bridge location and collapse are explained on the ground
- Braveheart myths get corrected, with attention to what’s known vs. imagined
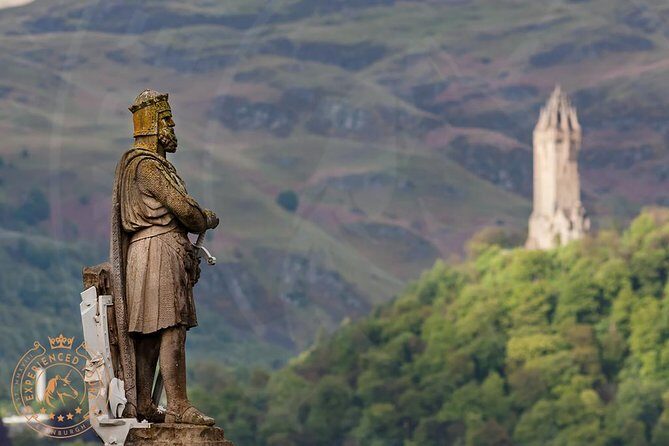
Stirling Bridge: Why This 1297 Battle Still Feels Close
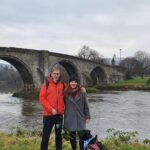
Stirling Bridge sits in a spot that’s easy to overlook if your plan is just to pass through on the way to something else. But this walk puts you where the story mattered, with the River Forth setting the scene for one of Scotland’s first major victories in the Wars of Independence.
I like that the tour doesn’t treat history like a distant museum label. You get the early arc, the pressure of the moment, and the legacy left behind—wrapped around a real place you can stand on today.
The tour also has a good sense of humor built into it. One guide jokingly works the Andrew De Moray connection into a modern reference (yes, “Andy Murray” comes up), then uses that hook to keep the story clear. That sort of light touch matters, because it helps the details land without feeling like memorization.
You can also read our reviews of more tours and experiences in Stirling.
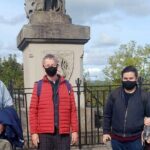
Meeting at Laurencecroft Road, Steps from the Old Bridge
You’ll start at Stirling Old Bridge, River Forth (FK8 1AQ), close enough to the old bridge area that you don’t have to spend time hunting landmarks. The meeting is described as being at Laurencecroft Road, just steps from the bridge, which is exactly what you want for a 1-hour-to-1-hour-and-15-minute tour.
This setup is practical for timing. If your day is packed—Edinburgh in the morning, Stirling after lunch—this kind of tight start time helps you keep your schedule intact.
It’s also geared toward real-world comfort. The experience allows service animals, and it’s near public transportation. Most people can join, but you should expect standing for stretches while the guide explains what you’re seeing.
What You’ll See at the Main Stop on the Bridge Walk
The entire experience centers on the Stirling Bridge area. It’s not a drive-by or a one-photo stop. Instead, the guide walks you through what likely happened here in 1297 and why William Wallace and Andrew De Moray became central figures so quickly.
The story arc moves through the early days, the turning points that pushed them to the front of Scotland’s independence struggle, and then the deaths and legacy that followed. If you’ve heard only the headline version of Wallace’s legend, you’ll get more shape and more cause-and-effect.
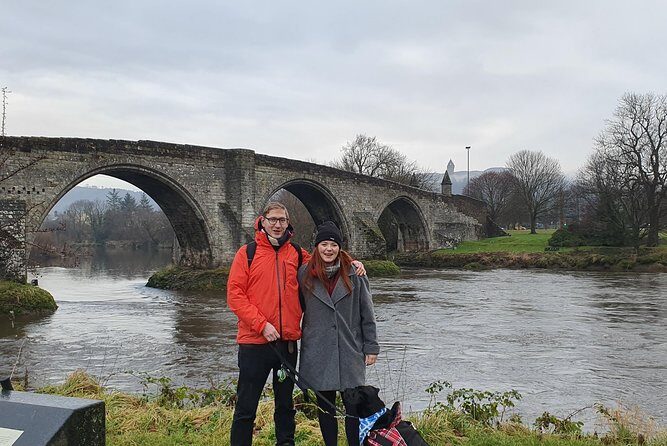
The Old Wooden Bridge: Where It Was and Why It Matters
This tour is especially strong for anyone who wants to connect battle tactics to real ground. You’ll be shown where the old wooden bridge from the Battle of Stirling Bridge was located, and you’ll also get an explanation of where it collapsed during the battle.
Today, there isn’t an intact bridge to look at. That’s why these location explanations are the heart of the tour. They give you a mental map for what the terrain would have meant to the fighters in 1297.
Wallace and De Moray, Not Just Their Names
I like that the focus stays on the people, not just the “war happened here” fact. William Wallace and Andrew De Moray get framed as part of a larger independence movement, with their roles tied to outcomes you can understand.
And because this is a small group, you can ask the follow-up questions that usually pop up when you finally see the bridge area for yourself.
How the Guides Make the 1297 Details Feel Real
The best thing about this tour is how it uses tools and explanations to make the unknowns feel less vague. One guide, David, uses a tablet to show details about the original wooden bridge’s placement. There’s not much left to see physically, so that kind of visual reference matters.
Another standout detail: a bridge model exists in the guides’ orbit. David has built a model of the original bridge in his yard, which the guide can reference to help you picture the structure and its scale. (And yes, there’s a funny moment in one guide’s explanation about the model’s construction.)
Even without a model, you’ll still get more than basic narration. The tour is built around standing in the right spot and getting the guide to “point” with clarity—where the bridge would have been, how the crossing would have worked, and why the collapse mattered for the outcome.
Braveheart Myths vs. the 1297 Story You Can Verify
If you’ve watched Braveheart, you’ll probably arrive with questions. This tour directly addresses that gap. One person specifically highlighted how the guide corrected incorrect tales and emphasized what’s actually known about the Stirling Bridge battle rather than the movie version.
That’s a big value point. A lot of history tours can’t resist repeating dramatic lines. Here, the approach is more grounded: you get the story, then you get help sorting legend from likely reality.
It also helps you enjoy the movie more for what it is: a dramatic retelling, not a field guide. You leave with both context and skepticism in a healthy balance.
Small-Group Size: The Difference Between Listening and Learning
The tour has a maximum of 15 travelers, and that small cap shows. In a group that size, you’re more likely to get individual answers instead of a single monologue aimed at the average question-holder.
You also feel the pacing. The tour runs about 1 hour to 1 hour 15 minutes, so it stays focused. You’re not stuck for a half-day while the guide catches up with people who joined late or wandered off to check their photo settings.
This is also why it pairs well with other Stirling plans. You can do the bridge walk and still have time to explore at your own speed afterward.
Expect an Outdoors-First Experience (Even When It’s Not Warm)
Because this is a walking tour in an outdoor riverside area, weather is the real deciding factor. The experience requires good weather, and if it’s canceled due to poor conditions, you’ll be offered a different date or a full refund.
That doesn’t mean it’s miserable on a breezy day, but it does mean you should dress for the kind of Stirling weather that can shift quickly. Wear layers, bring a light waterproof, and don’t plan on freezing for too long—but do plan for standing while the guide explains where the old bridge sat.
One review response even joked about weather conditions on a Monday. That tells you the guides are used to adjusting the mood and keeping things moving, even when skies aren’t cooperating.
Why People Pair This With Bannockburn on the Same Day
A common smart move is booking this Stirling Bridge walk alongside a Bannockburn tour the same day. Since Stirling is compact and the themes are linked by the Wars of Independence, it creates a clean storyline: one battle’s aftermath shapes the next stage of the struggle.
One person said they booked both for the same day and even got schedule flexibility because the group was small. That’s not something you should count on, but it shows how the small-group format can help tighten your day when plans are flexible.
If you do pair them, keep your expectations realistic. Two battle sites in one day is a lot of names. But if you like history that feels connected instead of scattered, it’s a strong combo.
The Price: How $34.45 Can Still Be Good Value
At $34.45 per person for about 1 hour to 1 hour 15 minutes, this isn’t a budget “wandering with a map” experience. You’re paying for two things: expert interpretation and on-the-ground storytelling that’s hard to recreate on your own.
The tour is also marked as admission ticket free at the main stop, which matters because you’re not paying extra for a museum fee to get something meaningful. You’re essentially paying for the guide’s ability to translate what you’re standing on into the battle’s logic.
For me, the value lands when:
- you want more than a plaque explanation,
- you’re okay with standing outdoors,
- and you like learning how myths get corrected without sucking the fun out.
If you only want the bare minimum, you could probably read a sign and move on. But if you want the why behind the battle—this is built for that.
Who Should Book This Stirling Bridge Tour
This tour makes sense if:
- you want Wallace and Andrew De Moray explained with clarity,
- you like learning from someone passionate about the subject,
- and you prefer a short, focused walk over a long driving tour.
It’s also a good option if you plan to explore Stirling afterward but don’t want to spend your first hour staring at the river and guessing what mattered.
If you’re the type who dislikes standing around for explanations, this might feel slow. The walking is light, but you’ll be stationary enough that comfort and weather clothing matter.
Things to Consider Before You Go
A few practical notes before you book:
- Dress for changing weather and bring a waterproof layer.
- Expect standing during explanations, not nonstop walking.
- If you want to compare the movie version of history to what’s more likely in 1297, this tour is set up for that.
Also, since the meeting is right by the bridge area, arrive with enough time that you’re not rushed. One late start story did happen, and while that’s not the norm you should plan around, it’s still smart to give yourself a buffer.
Should You Book This Stirling Bridge Tour?
Yes, if you care about the details behind Scotland’s independence story and you want a guide to point out where the battle likely played out. The small-group size, the focus on the old wooden bridge location and collapse, and the willingness to correct Braveheart inaccuracies make this feel more like guided history and less like recited trivia.
Skip it only if you hate outdoor standing, want a self-guided experience with zero waiting, or you’re already deeply fluent in the 1297 specifics and just want fast photos. For most people visiting Stirling, this is one of the best ways to turn a riverside view into a battle you can actually picture.
FAQ
How long is the Braveheart (Battle of Stirling Bridge) tour?
It runs about 1 hour to 1 hour 15 minutes.
Where do I meet for the tour?
You meet at Stirling Old Bridge, River Forth, Stirling FK8 1AQ, near the Old Stirling Bridge area.
Is this tour small-group?
Yes. It has a maximum of 15 travelers.
Is the tour in English?
Yes, the tour is offered in English.
Do I get a mobile ticket?
Yes. The tour provides a mobile ticket.
Is admission included?
The tour stop lists admission as free, so you should not need separate museum or site entry fees for this activity.
Does the tour happen outdoors?
Yes. It takes place outside around the bridge area, and it requires good weather.
What happens if the weather is bad?
If it’s canceled due to poor weather, you’ll be offered a different date or a full refund.
Can I cancel after booking?
You can cancel up to 24 hours in advance for a full refund.
Is it suitable for most people?
The experience notes that most people can participate, with service animals allowed as well.