Shetland’s north coast feels wild fast. This private 4-hour ride from Lerwick strings together classic Northern Exposure sights, from the Atlantic-to-North-Sea edge at Mavis Grind to cliff views at Eshaness. I like that the day mixes big scenery with small, meaningful stops—like the Tangwick Haa museum—rather than rushing from one viewpoint to the next.
What I like most is the human touch you get from your guide. People have come away praising guides like Drew, Danny, and Jackie, and drivers such as Maureen, Dave, and Paula for making the drive smooth and the stories stick. One thing to consider: you’re on a tight schedule, with plenty of driving included in the total time, so the time on foot is limited and weather matters.
In This Review
- Key highlights you’ll actually care about
- A Rugged Northern Exposure Day Trip That Makes Geography Feel Real
- Your Private Ride: Pickup, Timing, and What to Expect in 4 Hours
- Mavis Grind: The Strait Where Two Seas Share the Same View
- Hillswick: Photos, a Quick Stretch, and a Village-Shop Moment
- Tangwick Haa Museum: Small Stop, Strong Context for Northmavine Life
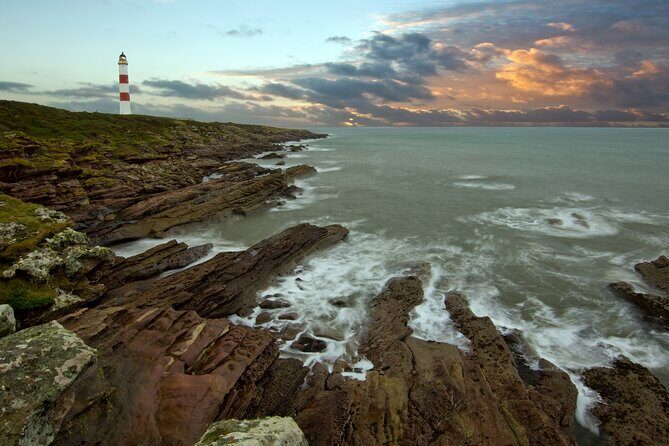
- Eshaness Cliffs: Spectacular Coastal Views and Volcanic Geology
- Braewick Café Break: A Seascape Pause You Can Keep or Skip
- Price and Value: Is $988.74 Worth It for Up to 6?
- The Human Factor: Guides and Drivers That Make the Coast Feel Personal
- Who Should Book This Tour (and Who Might Want More Time Somewhere Else)
- Should You Book This 4-Hour Northern Exposure Tour?
- FAQ
- How long is the Northern Exposure tour from Lerwick?
- How many people can be in the group?
- Where does pickup happen?
- What stops are included, and how long do you spend at each?
- What’s included in the price?
- What costs extra during the day?
Key highlights you’ll actually care about
- Private group of up to 6: you’re not squeezed into a big bus, and the pace can stay friendly.
- Mavis Grind switch: Atlantic on one side, North Sea on the other for an instant geography lesson.
- Hillswick village stop with quick photo time and a chance to browse the village shop.
- Tangwick Haa Museum included—small museum, focused on Northmavine’s life over time.
- Eshaness cliffs with walking time plus standout volcanic-coast geology.
- Refreshment break at Braewick Café is optional (and you pay for what you eat/drink).
A Rugged Northern Exposure Day Trip That Makes Geography Feel Real
Shetland can look simple on a map—just rock, water, and wind—but this tour turns that flat idea into something you can feel. You’re traveling along the Northmavine area with constant sea views, tight peninsulas, and cliff scenery that looks shaped by time and weather, not development.
You also get a smart mix of stops: one iconic coastal crossing (Mavis Grind), a practical village pause (Hillswick), an interpretive stop that explains the region (Tangwick Haa Museum), and then the big scenery moments (Eshaness). It’s the kind of half-day that helps you understand where you are—fast.
This is a private tour, offered in English, with pickup from your hotel or pier (if you’re arriving by cruise ship). Total duration is about 4 hours, and that includes the driving time, so it’s designed to be doable without eating your whole day.
You can also read our reviews of more tours and experiences in Lerwick.

Your Private Ride: Pickup, Timing, and What to Expect in 4 Hours
The schedule works like this: there’s a total of about 4 hours from start to finish, including travel. From Lerwick to the first major viewpoint area, you’re looking at roughly 40 minutes of driving time, then you’ll keep moving between stops fairly efficiently.
You’ll be in an air-conditioned vehicle, with parking fees covered and private transportation provided. You’ll also get a mobile ticket, which is convenient if you’re juggling day tours while you’re on the move.
A key practical point: since the itinerary includes scenic drives and cliff time, the day works best if you’re comfortable with getting on and off a vehicle a few times. The tour duration includes the travel, so don’t plan to tack on extra long activities afterward unless you’ve got buffer time.
Finally, the experience requires good weather. If conditions are poor, the operator may cancel and offer another date or a full refund—so it’s worth keeping some flexibility on your calendar.
Mavis Grind: The Strait Where Two Seas Share the Same View
The tour begins with a drive out of Lerwick. After about 40 minutes, you reach Mavis Grind, a narrow isthmus that links the Northmavine Peninsula to the Shetland mainland.
This stop is famous for a simple, striking claim: it’s said to be the only place in the UK where you could throw a stone from the Atlantic into the North Sea. Even if you don’t test that with a rock (please don’t), the view setup is what matters. You’ll see the Atlantic to one side and the North Sea to the other.
Why this stop works well on a short tour: it gives you an instant “aha” about why Shetland feels so exposed. It’s not just scenery—it’s the physical geography behind the winds, the currents, and the dramatic coastal edges you’ll see later at Eshaness.
Hillswick: Photos, a Quick Stretch, and a Village-Shop Moment
Next comes Hillswick, reached about 15 minutes from Mavis Grind. You’ll have a short comfort stop here—around 15 minutes—which is enough time for two practical things: quick photos and a visit to the village shop.
This is a good pacing tool. On a rugged coastline day, it helps to break up the driving so you can reset your legs and eyes. If you want a snack or a small item before the cliff area, this is a reasonable moment to do it.
What’s the tradeoff? Hillswick is brief by design. If you’re hoping for a long wander, you’ll want to plan that separately on another day.
Tangwick Haa Museum: Small Stop, Strong Context for Northmavine Life
Then you head to Tangwick Haa Museum, about 15 minutes from Hillswick. Admission is included, and you’ll have around 30 minutes inside.
This isn’t a giant museum with a lot of ground to cover. It’s focused on the history and everyday life of Northmavine over the years, using artifacts and photographs to tell the story. You’re effectively buying context for everything you’re seeing outside the vehicle.
Why I think this stop adds real value: when you hit Eshaness cliffs afterward, you’ll be looking at the coast with more understanding than “it’s dramatic.” You’ll have a clearer sense of how people lived in this region and how the environment shaped daily life.
A practical note: since your time is limited, keep an eye on the clock. 30 minutes is enough for the highlights if you don’t get lost reading everything word-for-word.
Eshaness Cliffs: Spectacular Coastal Views and Volcanic Geology
After Tangwick Haa Museum, the drive takes about 10 minutes to Eshaness Cliffs. This is one of the must-see parts of Shetland, and the tour includes time for about 20 minutes here.
The scenery is described as truly spectacular, with good walks along the coast. Eshaness is also known for its volcanic coast and strong geology, which gives the cliffs a more “why it looks like this” feel than a generic coastline photo stop.
Two practical considerations:
- Cliff areas often mean uneven or slippery footing, especially if weather turns. Give your boots/sneakers more attention than you would in a city sidewalk setting.
- The stop is short, so use the time for the best viewpoints and an easy walk—don’t try to cover the entire coast segment.
If you want a photo-heavy moment, this is where you’ll spend it.
Braewick Café Break: A Seascape Pause You Can Keep or Skip
Finally, you’ll reach Braewick, about 10 minutes from Eshaness. This is where the tour slows down slightly for a refreshment break at Braewick Café.
The key detail: guests are responsible for purchasing their own refreshments. Also, this stop can be removed at your request, so if you’d rather use that time to stretch your legs elsewhere or spend more time on the coast, you can ask.
After the café moment, you’ll return toward Lerwick. The drive back is about 1 hour, completing the loop.
If lunch isn’t planned around this stop, you’ll want to make sure you’ve eaten before the tour or plan a proper meal after. Lunch is not included, and since food is extra here, it’s smart to budget for at least a drink or snack.
Price and Value: Is $988.74 Worth It for Up to 6?
The price is $988.74 per group (up to 6) for about 4 hours. That means your cost depends on how many people you can pack into the private group.
On a value level, you’re paying for four things:
- Private guiding (so the day isn’t driven by a tight big-group schedule)
- Private transportation with parking fees handled
- Included admission to the Tangwick Haa Museum
- Efficiency: multiple major Northmavine highlights in one half-day
If you’re traveling as a family, a small group of friends, or two couples, this can start to look reasonable compared with piecing together separate transport and admissions. If you’re traveling solo, it’s still a great way to see the area, but the per-person price won’t feel like a bargain unless you’re happy paying for comfort and direction.
My practical take: the tour is best value when you treat it as your “orientation day” to northern Shetland—seeing the key places without having to plan routes, timing, and parking yourself.
The Human Factor: Guides and Drivers That Make the Coast Feel Personal
Even though the stops are scenic, the experience leans hard on the people running it. The best reviews mention guides and drivers who bring both information and personality to the day.
In past departures, guides like Drew, Danny, and Jackie have been praised for bringing the land to life. Drivers such as Maureen, Dave, and Paula are also specifically mentioned for being fun and for navigating the roads with confidence.
What this means for you: you’re more likely to get explanations that fit the moment you’re standing in—like why these coastlines matter, or what Northmavine life looked like—rather than just a list of place names.
And for a rugged route, that guidance matters. You’ll spend less mental energy figuring things out and more energy enjoying what you’re seeing.
Who Should Book This Tour (and Who Might Want More Time Somewhere Else)
This tour fits best if you:
- want a half-day that covers the main hits north of Lerwick
- prefer a private format (up to 6 people)
- like pairing scenery with context (Tangwick Haa Museum is a big part of that)
It’s also a good choice if you’re on a cruise and need a structured plan from the pier pickup. Pickup is offered from your chosen hotel or pier, and the tour is in English.
It may not fit if you:
- want long hikes or lots of time to explore villages slowly
- plan to visit multiple distant sites in the same day (this one already has travel time built in)
- hate weather uncertainty (the experience requires good weather)
Most participants can take part, and service animals are allowed, which makes it more flexible than some outdoor-only options. It’s also near public transportation, which can help if you’re coordinating your own timing around other plans.
Should You Book This 4-Hour Northern Exposure Tour?
If your goal is to get the feel of northern Shetland without spending a whole day driving, I think this tour is a smart pick. The combination of Mavis Grind, Tangwick Haa Museum, and Eshaness cliffs hits both the “wow” factor and the “why does it look like that” factor.
I’d book it if:
- you value a guided day with stops that actually explain the region
- you’re traveling with a small group and want private comfort
- you’re okay with a short, efficient pace and a weather-dependent schedule
I might hesitate if:
- you want extensive walking time or long village exploration
- you’re highly sensitive to changes in weather plans
Given the included museum admission and the fact it’s private for up to 6, it’s one of those tours where the value improves quickly the more people you can share it with.
FAQ
How long is the Northern Exposure tour from Lerwick?
The tour lasts about 4 hours, and that total includes the travel time.
How many people can be in the group?
It’s a private tour/activity, and the group size is up to 6 people.
Where does pickup happen?
Pickup is offered from your chosen hotel or from the pier if you’re arriving by cruise ship.
What stops are included, and how long do you spend at each?
You’ll pass Mavis Grind, then have stops in Hillswick (about 15 minutes), Tangwick Haa Museum (about 30 minutes), Eshaness Cliffs (about 20 minutes), and Braewick for refreshments (time is part of the final portion of the tour). Travel times between areas are built into the 4-hour total.
What’s included in the price?
Included items are air-conditioned vehicle, private transportation, parking fees, and admission to Tangwick Haa Museum.
What costs extra during the day?
Lunch is not included. At Braewick Café, refreshments are also not included, so you’ll need to buy what you want.