REVIEW · GLASGOW
Stirling Castle The Trossachs & Loch Lomond
Book on Viator →Operated by Glasgow Chauffeur Hire Ltd · Bookable on Viator
Six hours, several wow-moments. This one-day run packs Stirling Castle and Loch Lomond views into a tight schedule, so you get big Scotland variety without bouncing around on your own. I especially like the way it balances a major landmark with smaller stops that actually let you step out and look around, plus the short, scenic finishes.
You’ll also appreciate the countryside mood: Loch Lomond at Luss Pier is the kind of end-of-day payoff that makes the drive worth it. The main drawback to watch is time: most stops are brief, and Stirling Castle admission tickets aren’t included, so you’ll want to budget extra before you go.
In This Review
- Key highlights to know before you book
- Why this day works: Stirling Castle to Loch Lomond in one push
- Getting there in comfort: pickup, private pacing, and an 8:30 start
- Stirling Castle in 90 minutes: what you can realistically focus on
- Bracklinn Falls Bridge and Callander Crags: a quick hit of Trossachs scenery
- Balmaha Millennium Forest Path and The Oak lunch break
- Kilmahog Woollen Mill and the Hamish and Honey cow moment
- Luss Pier on Loch Lomond: the short walk that ends the day right
- Price and logistics: is $888.29 per group good value?
- Who this tour suits best (and who might want something else)
- Should you book this Stirling and Loch Lomond day?
- FAQ
- Where does the tour start and what time?
- How long is the tour?
- Is pickup included?
- How many people are in a group?
- Are admission tickets included?
- Is the ticket digital?
- Are service animals allowed?
- What is the cancellation policy?
Key highlights to know before you book

- Private group up to 6: your group stays together with a dedicated chauffeur.
- A full Scotland mix in one day: castle, falls/bridge viewpoints, a forest path, a wool mill, and Loch Lomond.
- Short stops you can plan around: quick photo breaks plus a couple of better windows for walking.
- Balmaha lunch window at the Millennium Forest Path and The Oak stop.
- Kilmahog Woollen Mill cow time: meet Hamish and Honey, with optional feeding.
- Luss Pier is the scenic closer: a walk along the pier to the end with Loch Lomond in view.
Why this day works: Stirling Castle to Loch Lomond in one push
This is the kind of tour that makes sense when you want Scotland on one schedule, not on five different tickets and five different days. You start in Glasgow at 8:30am, and you finish with a Loch Lomond view that feels like a vacation moment. The total time is about 6 to 8 hours, which is long enough to get meaningful stops but not so long you lose the whole day to transit.
I like the structure because it mixes “big ticket” and “slow down and look.” The day begins with Stirling Castle, a classic Scotland anchor. Then it shifts into the Trossachs feel—water, hills, and villages—before ending at Luss Pier for that Loch Lomond line-of-sight walk.
One practical reality: it’s not a relaxed, all-day hike tour. Most stops are set at around 15 to 30 minutes, with Stirling Castle getting 1 hour 30 minutes. If you hate rushing, this could feel like a sprint. If you prefer a compact hit of the highlights, it’s a strong match.
You can also read our reviews of more tours and experiences in Glasgow.

Getting there in comfort: pickup, private pacing, and an 8:30 start
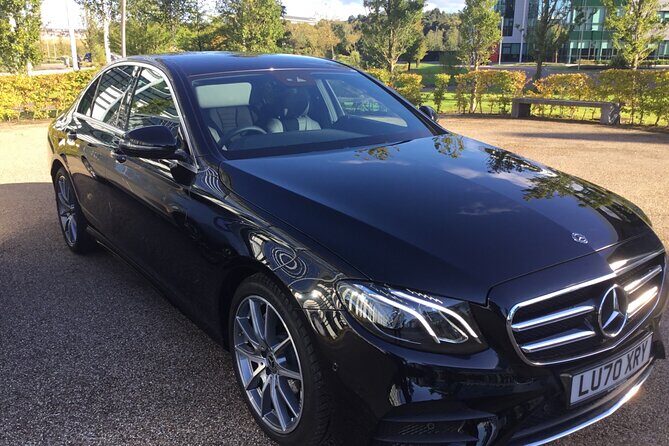
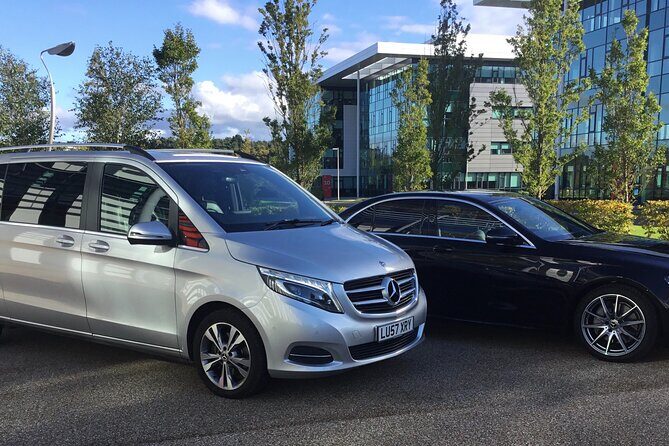
You’re doing a lot of driving in one day, so how you travel matters. This is a private tour, meaning it’s only your group. That helps you keep a steady pace without waiting around for strangers to return from a bathroom break (yes, that happens on group tours).
Pickup is offered, and you’ll also have a mobile ticket. Those two things may sound small, but they matter when your morning starts early. An 8:30am start means you’ll want to be ready to roll—bag packed, shoes on, camera charged—because the day moves.
Because the group size is capped at up to 6, you’re not crammed into a huge crowd. That usually leads to more calm conversations and easier transitions between stops. It’s also a good setup for couples, small families, or friends traveling together who want control over the day’s rhythm.
Stirling Castle in 90 minutes: what you can realistically focus on

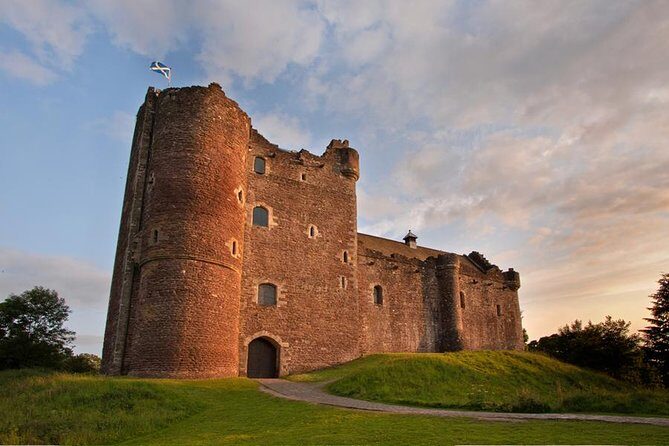
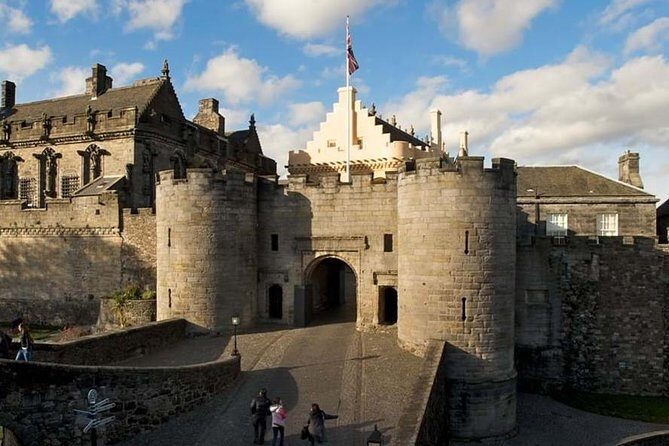
Stirling Castle is the headline stop, with about 1 hour 30 minutes on-site. Admission is not included, so you’ll want to plan for that cost separately and consider booking the ticket portion in advance if you’re able.
With 90 minutes, you should think less in terms of seeing every single room and more in terms of picking what matters most to you. For example, you’ll likely want to:
- Get a quick orientation so you don’t waste time wandering
- Spend your best effort on the areas that give you the most dramatic views and historic highlights
- Leave room for a short sit-down moment if you want to absorb the place without feeling frantic
Stirling Castle works well early in the day because your energy is higher and the crowds tend to feel more manageable. It also sets the tone for everything after—once you’ve seen the castle scale, the smaller countryside stops feel more connected, like you’re moving through the same Scotland story.
If you’re the kind of traveler who loves slow museum-style pacing, you may feel the time constraint. But if your goal is to tick off one major castle experience plus the Trossachs, this window is a practical compromise.
Bracklinn Falls Bridge and Callander Crags: a quick hit of Trossachs scenery
After Stirling Castle, you head to the countryside mood shift: Bracklinn Falls Bridge and Callander Crags, plus a stop in Callander. This portion is about 30 minutes, and it’s short by design.
In a time window like this, your job is to keep it simple:
- Move toward viewpoints first
- Take photos quickly
- Then slow down for a minute if the view is worth it (often, it is)
This is where the day starts to feel like Scotland beyond monuments—water shapes, rocky crags, and a village atmosphere. Callander itself gives you a sense of real daily life, which helps the castle visit feel less like a standalone stop and more like part of a connected region.
The drawback is obvious: you won’t have time for long walks. If you want a deep exploration of Callander Crags or a long loop hike, this stop won’t be long enough. But as a scenic reset between big attractions, it’s a smart use of time.
Balmaha Millennium Forest Path and The Oak lunch break
Next comes Balmaha and the Millennium Forest Path, with a specific mention of The Oak. This stop is about 30 minutes, and it’s also described as a lunch window.
So what does this mean for you? It’s a chance to stretch your legs a bit after the castle and the short viewpoint stop. A forest path stop is often less about covering distance and more about resetting your senses: green space, a calmer pace, and a place to pause before the day gets more hands-on.
You’ll also get the lunch break here, which is a big deal on a packed day. Since lunch options aren’t specified in the information you have, treat this as time carved out for food rather than assuming anything specific is included. If you’re the type who likes to eat well without hunting, it helps to plan ahead on what you’ll do for lunch.
This stop is also a nice contrast to the hard stone feeling of Stirling Castle. Trees and walking give you a different kind of Scotland. Even a short stroll can make the whole day feel more balanced.




Kilmahog Woollen Mill and the Hamish and Honey cow moment
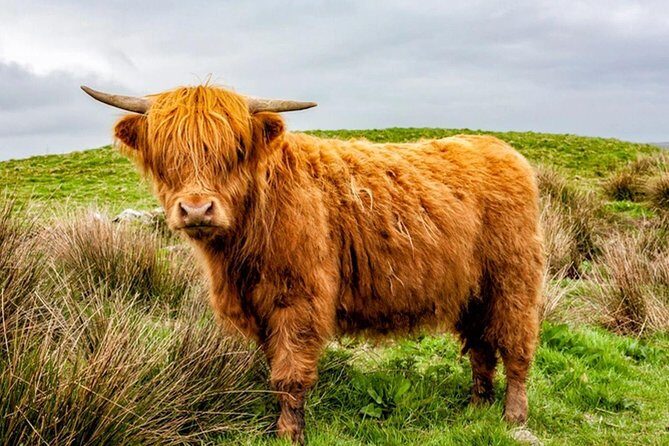
The day adds something playful: Kilmahog Woollen Mill and a chance to meet Scottish highland hairy cows Hamish and Honey. The time here is about 15 minutes, and feeding is optional.
This is the kind of stop I love because it breaks the pattern of “look, photograph, move on.” Even with a short window, it gives you a hands-on connection to the region’s farming culture. You’re not just viewing Scotland from the roadside—you’re interacting with animals, and that can be the most memorable part of the day, especially for families.
A quick heads-up: with only 15 minutes, the cow-and-mill experience is about getting the moment, not hanging out for a long interaction. If feeding is on your list, make sure you move promptly so you don’t lose time to just watching from afar.
This also makes sense as a mid-to-late day activity: by the time you reach Kilmahog, you’ve already seen the major sights. Now you’re doing something that feels more local and less formal.
Luss Pier on Loch Lomond: the short walk that ends the day right
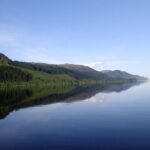
The last scenic stop is Luss Pier. You get about 15 minutes to walk along the pier all the way to the end, with Loch Lomond in your view the entire time.
This is a clever way to end a day. A pier walk is short enough that you’re not exhausted at the finish, but it’s long enough to feel like a real transition from “sightseeing mode” to “just enjoy the view mode.” Looking straight over the water from the pier gives you that classic Loch Lomond feeling—especially on a clear, sunny day.
If you want to make the most of those 15 minutes:
- Put your camera away for part of the walk and just look
- Walk to the end at least once, even if you’re tempted to linger near the start
- Take one last photo from where the view looks strongest, then come back
The information here doesn’t mention anything like a boat ride, so think of it as a view-and-walk finish. Done well, that’s all you need.
Price and logistics: is $888.29 per group good value?

The price is $888.29 per group, and the tour supports up to 6 people. That pricing is often easier to justify when you’re traveling with others, because the cost is shared by the group rather than built strictly per person like many standard tours.
If you fill the group:
- Up to 6 people means the price averages about $148 per person at the maximum group size
That’s before admissions, since the information clearly notes that admission tickets aren’t included (at least for Stirling Castle, with the same note applied to the stops listed). So your real total cost will be higher if you plan to pay for Stirling Castle entry and anything else that requires a ticket.
Still, the value case here is strong if you want:
- A private chauffeur setup
- Pickup offered
- A route that strings together castle + countryside + Loch Lomond in one day
- Short, efficient stops that maximize what you can see
Another subtle value point: timing. This tour is booked about 149 days in advance on average, which usually suggests good demand. If you’re visiting during peak periods, that booking window matters—secure your date before your schedule gets crowded.
Who this tour suits best (and who might want something else)
This tour fits best if you want a high-coverage day. You’re not doing one museum and calling it a win. You’re doing Stirling Castle, quick nature and village stops around Callander and Balmaha, a local mill stop with cows, and then a Loch Lomond finish.
It’s also a good fit for:
- Small groups that want privacy rather than crowds
- Couples who like scenic variety more than deep study at each stop
- Families who want an easy, structured day with a fun animal moment at Kilmahog
You might want a different style of tour if you:
- Hate short time windows and would rather spend longer at fewer places
- Want a full-length hike or a long, slow exploration of Callander Crags or the forest
- Prefer that admissions are bundled into the price (this one isn’t)
Should you book this Stirling and Loch Lomond day?
If you’re aiming for maximum Scotland highlights in one day, I’d say yes—with one condition: go in with the right expectations about time. The stops are brief by design, and the castle admission is on you, not included in the base price. When you accept that, the day’s pacing makes sense. You get a castle anchor, a Trossachs nature break, a lunch window in Balmaha, an authentic-feeling cow-and-mill stop, and then a Loch Lomond pier walk that can feel like a reward.
If your group is up to 6 and you value private comfort plus a packed itinerary, this is a solid choice. If you want slow travel and lots of wandering, you’ll likely feel rushed.
FAQ
Where does the tour start and what time?
The tour starts at 8:30am in the Glasgow area.
How long is the tour?
The duration is about 6 to 8 hours.
Is pickup included?
Pickup is offered.
How many people are in a group?
This is a private tour/activity. Only your group participates, with a maximum group size of up to 6.
Are admission tickets included?
Admission tickets aren’t included for the stops listed (including Stirling Castle).
Is the ticket digital?
Yes. You’ll receive a mobile ticket.
Are service animals allowed?
Yes. Service animals are allowed.
What is the cancellation policy?
You can cancel for a full refund if you cancel at least 24 hours before the experience’s start time. Free cancellation is offered within that window.